
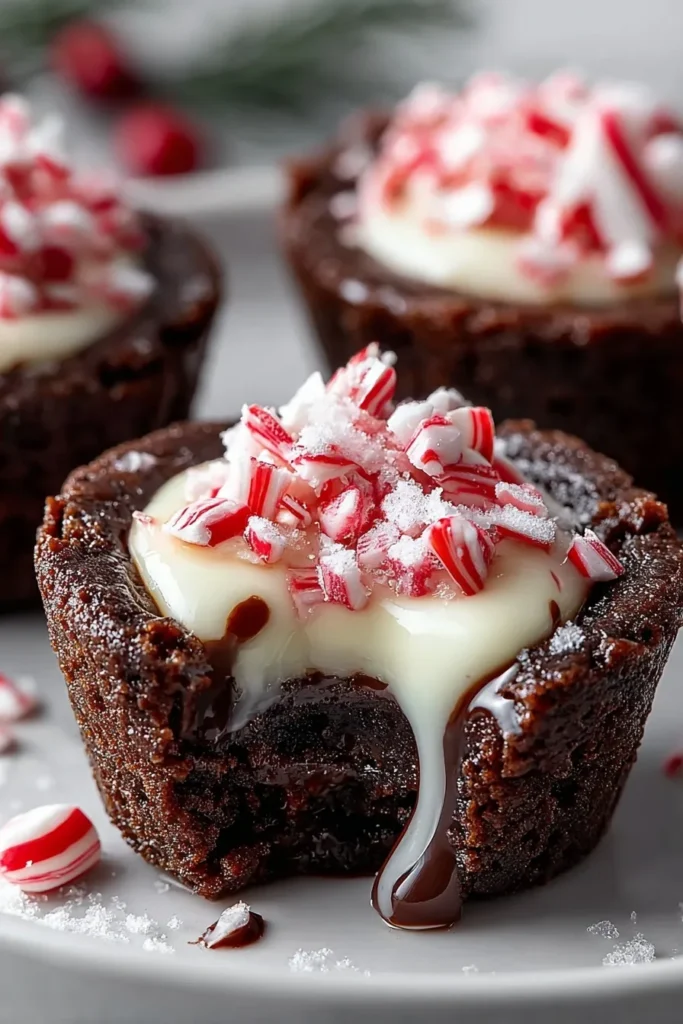
Craving something simple during the holiday season but tired of complicated baking projects that take over the kitchen? These peppermint cookie cups are made for moments like that—when you want a festive dessert that looks special without feeling overwhelming. With rich chocolate cookie bases and a smooth peppermint cheesecake filling, they fit perfectly into holiday baking plans focused on mini Christmas desserts and easy sharing. If you’re looking for individual Christmas desserts that feel thoughtful and practical, this recipe checks every box.
Why This Recipe Works
- Perfectly portioned cookie cups that are easy to serve and store
- Balanced textures with soft chocolate cookies and creamy filling
- Festive peppermint flavor that feels seasonal without being overpowering
- Make-ahead friendly for stress-free holiday prep
- Ideal for dessert trays and Christmas mini desserts displays
Ingredients
Chocolate Cookie Cups
- 2 cups all-purpose flour
- 1/4 cup Dutch-processed cocoa powder (sifted)
- 1/4 cup black cocoa powder
- 1 tsp baking soda
- 1/2 tsp salt
- 1 cup unsalted butter (room temperature)
- 1/2 cup granulated sugar
- 1 cup light brown sugar (packed)
- 2 large eggs (room temperature)
- 1 tsp vanilla extract
Peppermint Cheesecake Filling
- 1 cup heavy whipping cream (chilled)
- 8 oz cream cheese (full fat)
- 1/2 cup granulated sugar
- 1 tsp peppermint extract
- red color gel (for piping bag decoration)
- candy canes (chopped, for garnish)
Ingredient notes: Using room-temperature butter and eggs ensures smooth cookie dough. Full-fat cream cheese is essential for a stable, creamy filling.
Step-by-Step Instructions
- Preheat and prepare the pans
Preheat the oven to 350°F (175°C). Spray two regular-sized cupcake tins thoroughly with cooking spray, making sure the bottoms and sides are well coated to prevent sticking. - Mix the dry ingredients
In a medium bowl, whisk together the all-purpose flour, Dutch-processed cocoa powder, black cocoa powder, baking soda, and salt until evenly combined. Set aside. - Cream the butter and sugars
In a large mixing bowl, beat the unsalted butter, granulated sugar, and light brown sugar on medium-high speed for 2–3 minutes, until the mixture looks light, fluffy, and well blended. - Add eggs and vanilla
Reduce the mixer speed to low. Add the eggs one at a time, mixing well after each addition. Add the vanilla extract and mix until fully incorporated. - Combine wet and dry ingredients
Gradually add the flour mixture to the butter mixture. Mix just until combined, stopping as soon as no dry streaks remain to avoid overmixing. - Portion the dough
Using a large cookie scoop or about 3 tablespoons of dough, divide the dough evenly among the prepared muffin cups. Press lightly to level the tops if needed. - Bake the cookie cups
Bake for 10–13 minutes, until the cookies are mostly set around the edges but still soft in the centers. Avoid overbaking to keep the cups tender. - Create the wells
Immediately after removing the pans from the oven, press firmly into the center of each cookie using a small jar or container to form a well for the filling. - Cool properly
Let the cookie cups cool in the pan for 10 minutes. Gently twist each one to loosen, then let cool another 5 minutes before transferring to a wire rack to cool completely. - Whip the cream
In a cold bowl with a cold whisk, whip the heavy cream until stiff peaks form. Set aside. - Make the cheesecake base
In a separate bowl, beat the cream cheese, granulated sugar, and peppermint extract until smooth and creamy, scraping down the sides as needed. - Fold the filling
Gently fold the whipped cream into the cream cheese mixture until fully combined and smooth. - Prepare the piping bag
Using a small food-safe paintbrush, paint two red stripes inside a piping bag fitted with a large round tip. Carefully fill the bag with the peppermint cheesecake filling. - Fill the cookie cups
Pipe a generous swirl of filling into each cooled cookie cup, filling the wells completely. - Chill to set
Refrigerate the filled cookie cups for 1–2 hours, or until the filling is firm and set. - Garnish and serve
Just before serving, sprinkle chopped candy canes over the tops. Serve chilled, or refrigerate and enjoy within 2–3 days.
Expert Tips for Best Results
- Press the wells immediately after baking while the cookies are still soft.
- Chill the filling before piping if your kitchen is warm.
- Use a gentle folding motion to keep the filling light.
- Add candy cane garnish just before serving to keep it crisp.
Flavor Variations and Custom Ideas
- Serve as part of a Christmas dessert cups assortment.
- Use these as a base for holiday cookie decorating ideas.
- Pipe smaller swirls for bite-size mini cookie cups.
- Freeze without garnish for longer storage and decorate later.
- Pair with other peppermint dessert recipes on a holiday tray.
Storage and Reheating
Store the filled cookie cups in an airtight container in the refrigerator for up to 2–3 days. For longer storage, freeze without the candy cane topping for up to 4 weeks. Thaw overnight in the refrigerator before serving. Reheating is not recommended, as these are best enjoyed chilled.
Nutrition Information
Approximate values per cookie cup (based on 24 cups):
- Calories: 310
- Fat: 18g
- Carbohydrates: 32g
- Protein: 4g
Nutrition values are estimates and may vary depending on ingredients used.
Frequently Asked Questions
Can I make these ahead of time?
Yes, they’re ideal for making a day or two in advance.
Why use black cocoa powder?
It deepens the chocolate flavor and color without added sweetness.
Do these need refrigeration?
Yes, due to the cheesecake filling.
Can I freeze them fully assembled?
Freeze without candy cane topping for best texture.
How do I keep them from sticking?
Spray the muffin tins thoroughly and twist gently while cooling.
Conclusion
These festive peppermint cookie cups bring together rich chocolate cookies and creamy peppermint filling in a practical, shareable format. Perfect for holiday trays and individual Christmas desserts, they’re a reliable make-ahead option that’s worth keeping for busy days.
Print
Festive Peppermint Cookie Cups for Individual Christmas Desserts
Description
These festive peppermint cookie cups feature rich chocolate cookie bases filled with creamy peppermint cheesecake and topped with crunchy candy canes. Perfectly portioned and easy to make ahead, they’re an ideal choice for Christmas dessert trays, holiday parties, and individual Christmas desserts.
Ingredients
Chocolate Cookie Cups
-
2 cups all-purpose flour
-
1/4 cup Dutch-processed cocoa powder (sifted)
-
1/4 cup black cocoa powder
-
1 tsp baking soda
-
1/2 tsp salt
-
1 cup unsalted butter (room temperature)
-
1/2 cup granulated sugar
-
1 cup light brown sugar (packed)
-
2 large eggs (room temperature)
-
1 tsp vanilla extract
Peppermint Cheesecake Filling
-
1 cup heavy whipping cream (chilled)
-
8 oz cream cheese (full fat)
-
1/2 cup granulated sugar
-
1 tsp peppermint extract
-
Red color gel (for piping bag decoration)
-
Candy canes, chopped (for garnish)
Instructions
-
Prepare oven and pans
Preheat oven to 350°F (175°C). Spray two regular cupcake tins thoroughly with cooking spray. -
Mix dry ingredients
In a medium bowl, whisk together flour, Dutch-processed cocoa powder, black cocoa powder, baking soda, and salt. Set aside. -
Cream butter and sugars
In a large bowl, beat butter, granulated sugar, and brown sugar on medium-high speed for 2–3 minutes until light and fluffy. -
Add eggs and vanilla
Reduce speed to low. Add eggs one at a time, mixing well after each. Add vanilla extract and mix until combined. -
Combine dough
Gradually add dry ingredients to wet ingredients, mixing just until combined. -
Portion dough
Scoop about 3 tablespoons of dough into each muffin cup. -
Bake
Bake for 10–13 minutes, until edges are set and centers remain soft. -
Form cookie cups
Immediately press a small jar or container into the center of each cookie to create a well. -
Cool
Cool in pans for 10 minutes, gently twist to loosen, cool another 5 minutes, then transfer to a wire rack to cool completely. -
Whip cream
In a cold bowl, whip heavy cream until stiff peaks form. -
Make cheesecake filling
In another bowl, beat cream cheese, sugar, and peppermint extract until smooth. -
Fold filling
Gently fold whipped cream into cream cheese mixture until fully combined. -
Prepare piping bag
Paint two red stripes inside a piping bag fitted with a large round tip. Fill with peppermint cheesecake mixture. -
Fill cookie cups
Pipe filling into cooled cookie cups. -
Chill
Refrigerate for 1–2 hours until filling is set. -
Garnish and serve
Sprinkle with chopped candy canes before serving.
Notes
-
Press cookie wells immediately after baking while cookies are soft.
-
Chill before serving to ensure the filling sets properly.
-
Add candy cane garnish just before serving for best crunch.